Install Logic Pro with All Audio Indexed for All Users
Check out the revisited method for accomplishing this task in this post! (That’s a link there..click it!)
One of the most annoying tasks I was given when I started working at UArts was to package and install Apple Logic Pro X with all of the audio add-ons as well as indexing for all users. This took a lot of trial and error, but I finally managed to get it to work and I want to share how I was able to accomplish it especially since I’ve seen many people in the MacAdmins.org slack channel and JAMFNation ask about it.
In order to get everything you need, you have to figure out if you want to have Logic only or if you want to install GarageBand as well. Why would you want this? if you’re in a lab environment you might have different user levels or you may have different people requesting. Either way, it’s something you need to take into account because both Logic and GarageBand share audio. I installed both, so I had a lot of data to get and push out.
I won’t go into how to get and install Logic and GarageBand into detail but my method was straightforward; get the latest versions of both programs via the Mac App Store, drop them into Composer and make a DMG (or PKG, whichever you want). You can do what you wish to remove receipts from these packages (I used to use Rich Trouton’s method outlined here but have moved on to use Max Schlapfer’s AppStore Extractor Script) or you can leave them in tact if you don’t care about that. Once you have those apps installed you can move onto the long part, downloading all of the additional content.
This part is the easiest, but it takes the longest by a mile. Open Logic and let it download the needed content, no need to worry about capturing anything yet. Once you complete the initial download open the Sound Library Manager from the Logic Pro X menu and hit the “Select All Uninstalled” button (You have to create a new blank project to get to the menu). This will take hours to complete depending on your bandwidth and your computer, be patient. This install will ask for an admin password and after installation Logic will index these files. Just let it happen, we’ll work on that later.
Once that is complete, open GarageBand and repeat the steps above. The only difference is that there is no Sound Library Manager. You just go to the GarageBand menu then under Sound Library you should see Download All Available Sounds. Select that and wait again. GarageBand will also index these files. Once you’re 100% sure you have everything you need downloaded and installed now comes the fun part, packaging those sounds!
I used Casper Composer to package the sounds but if you have another method you prefer this should still work. First you need to know where every sound is stored. One of my trials consisted of me using Composer to see where those audio files were going and to my surprise there are only a few folders which things get written. Here are the only folders we care about:
1
2
3
4
5
/Library/Application Support/GarageBand
/Library/Application Support/Logic
/Library/Audio/Apple Loops
/Library/Audio/Apple Loops Index
/Library/Audio/Impulse Responses
You can get information on these folders and you’ll notice how large they are. It should be noted that even if you only install one application (GarageBand or Logic) you may still see both folders in Application Support because these apps share libraries.
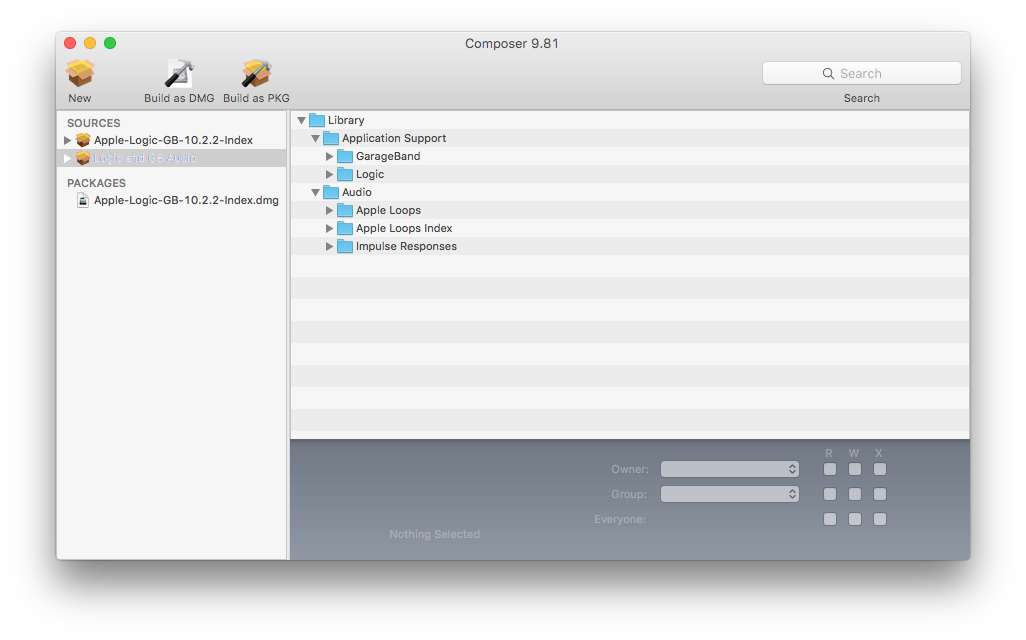
To make the package, drag all of these folders into Composer and then build it with your preferred method (I prefer DMG’s).
 |
|---|
| Composer showing Logic/GarageBand Files |
The created package came out to be 49.14GB for Logic version 10.2.2 and GarageBand 10.1.1. Once you have the audio package, you’re almost done! The next part is grabbing the index.
 |
|---|
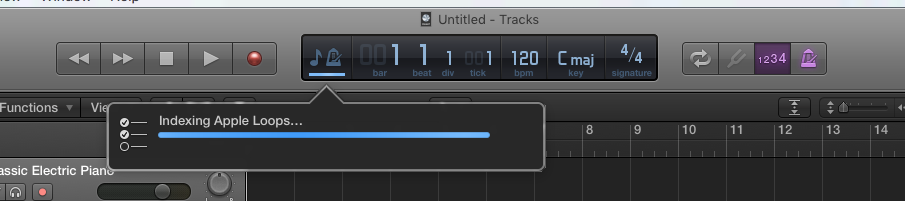
| Click the tiny bar under the metronome shows background task progress. |
Logic and GarageBand index their sound files to speed up searching and loading, it’s also used for metadata and tagging. After you installed your sounds both programs should have indexed those files for you. Starting with Logic 10.1 started doing this in the background but you can see the progress by clicking the little tiny bar in the main console display. The problem with the index is that it is not system-wide, it’s a per-user index! This is done so users can set their own tags and favorites if they would like. In a single-user environment this is totally fine, let it index once and you’re done. In a lab environment, this isn’t a good thing; depending on a number of factors (number of loops installed, speed of processor, SSD vs Spinning HD) this can take a long time and before 10.1 our older machines took upwards of 20 minutes to complete indexing. Before Logic 10, indexing could be accomplished with a script that runs in the background, even if a user wasn’t on the machine, and then you can fill your user templates. Unfortunately this was no longer the case, so I had to improvise and this is where Composer came into play the most.
In order to get the index, load up Composer and grab a “New & Modified Snapshot.” Once you have Composer waiting, open Logic and get to the main window by creating a new empty project. Go to View and select Show Apple Loops from the menu. In the Apple Loops sidebar click at the top where it says “Loops” and go all the way to the bottom and hit “Reindex all Loops.” When that’s complete, close Logic (do not save the project), open GarageBand, and repeat the process there. After you reindex both programs and quit them simply return to Composer and complete the snapshot.
Now, you’re going to see that tons of folders were touched during this process. Thankfully, I’ve gone through them all for you and narrowed down what I believe is needed for the index to work.
 |
|---|
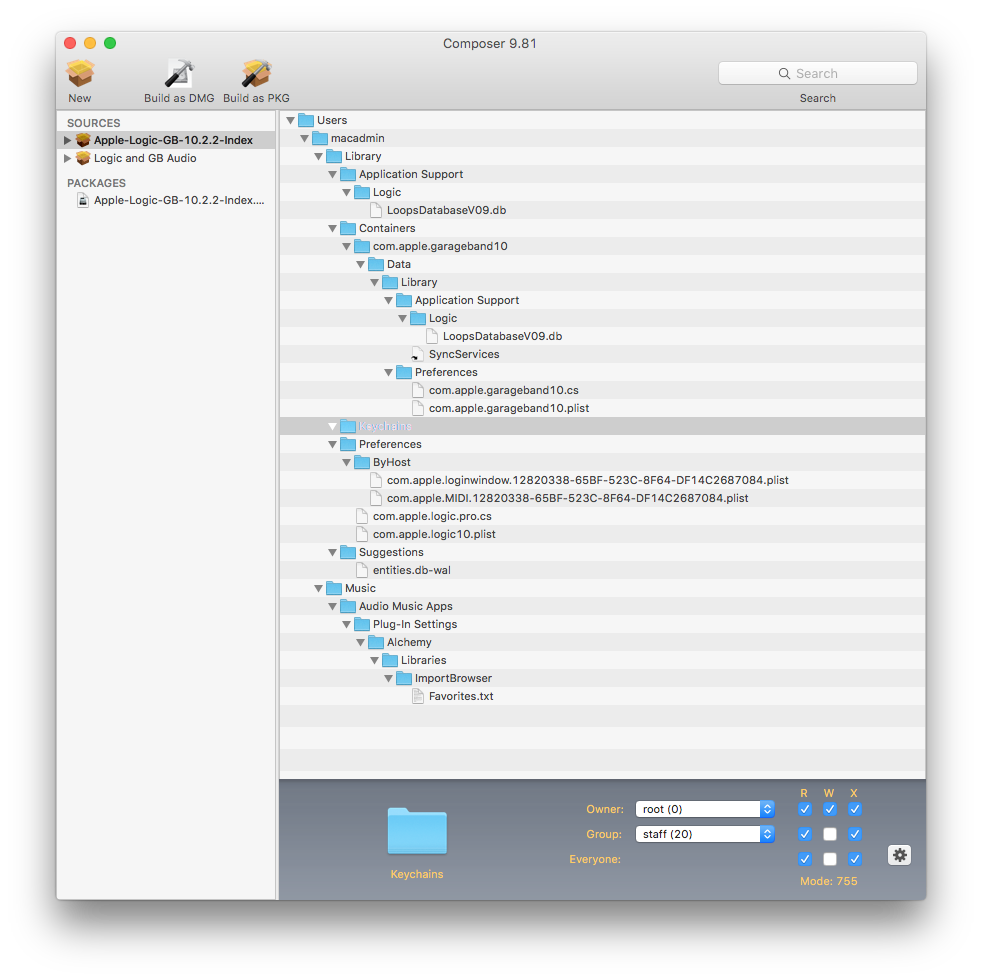
| Composer showing the files needed for Logic and GarageBand indexes. Note the highlighted folder. |
Notice that you only need to worry about the items in the user home directory, any system-wide folders can be removed from the capture. You may also notice in your setup that you don’t have a “Keychains” folder (as highlighted above). This doesn’t get captured during the snapshot but for some reason it is needed; if you don’t include it you will be prompted for an admin password when the apps load next time. Just create an empty folder in Composer. Am I 100% certain that every single one of these files is needed for an index? Nope. But these are the files that I have in my package and I have found this to work every time I push out my package. Once you have this, build it as a DMG because you’re going to have to use this to fill user templates and fill existing users in your JSS.
When making a configuration or policy be sure to have your installation order set properly. Apps install first (priority 10) then the audio content (priority 13), then index (priority 15).
 |
|---|
| Note the order of installation and the FUT and FEU selection. |
If you’re doing this as image time you should also have the loops and index go at first boot. Installation will take some time (I mean, you are pushing out 50+ GB compressed over your network) but once it’s complete you can test by logging in as any user and loading Logic or GarageBand without fear of having to index for every user!
It should also be noted that this method should work if you have only one of the Apps installed. You can even have all of the loops from both apps with just one installed.
If you have any questions or issues with this method, please comment and I’ll do my best to help.